Support Pack Upgrade in SAP-SPAM-Complete Guide
This Support Pack Upgrade Guide answers below queries:
- How to upgrade support package in sap
- sap support package upgrade steps
- Different support pack upgrade phases
- What to do with SPDD and SPAU
- Support pack upgrade prerequisites
- How to uncar Support packs.
- How to update SPAM in sap
Pre-requisites for Support Package :
- Download support pack from SAP Service market Place
- Uncar Support Packs .SAR Files SAP
- Check enough space under /usr/sap/trans directory.
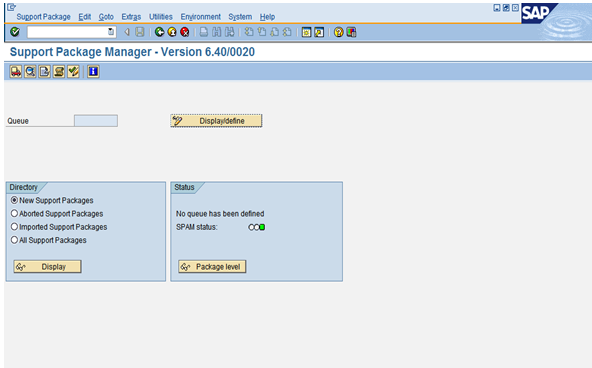
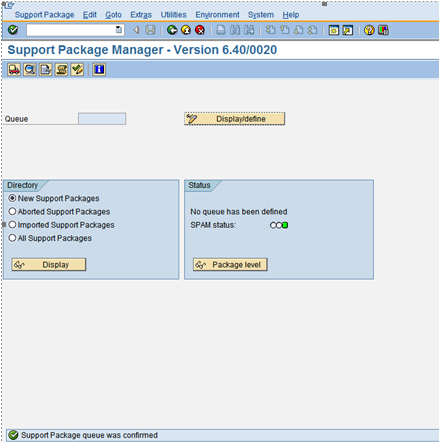
Installing the support package using transaction SPAM
- Log into SAP GUI, client 000 as user upgrade
- Go to transaction SPAM

Step 1 : SPAM/SAINT Update:
A SPAM/SAINT Update contains updates Support Package Manager (SPAM) program as well Add-On Installation Tool SAINT program. SPAM/SAINT update is recommended for support package upgrade.
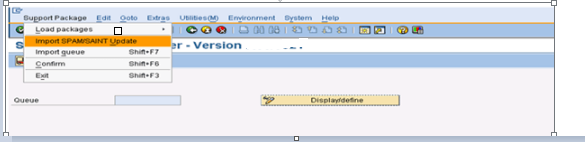
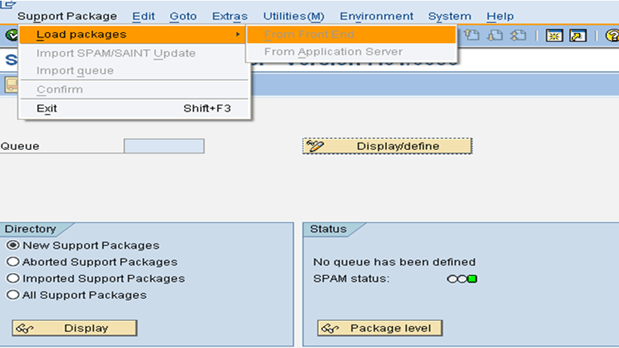
Step 2 : Load Package :
Load support packages we have two options:-
- From Application Server
2. From Front End >> If file size is less than 16 MB.
Normally we do it from Application Server:
- From the menu bar select Support Packages >> Load Packages >> From Application Server – this will load all of the support packages into the queue
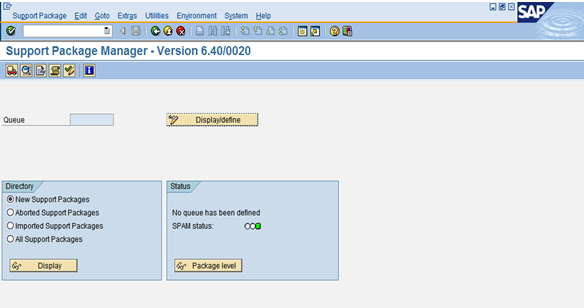
Step 3 : Display/Define Queue:
- Click the Display/Define button
Step 4 : Calculate Queue:
- Click the All Components button/Select particular components
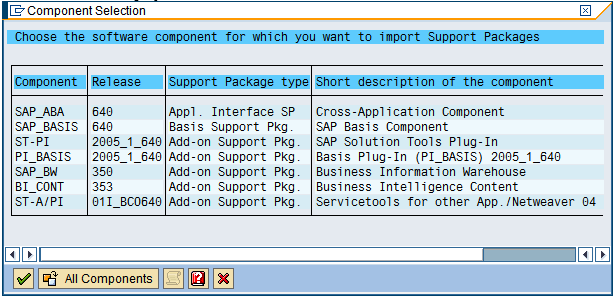
- Click the Calculate Queue button
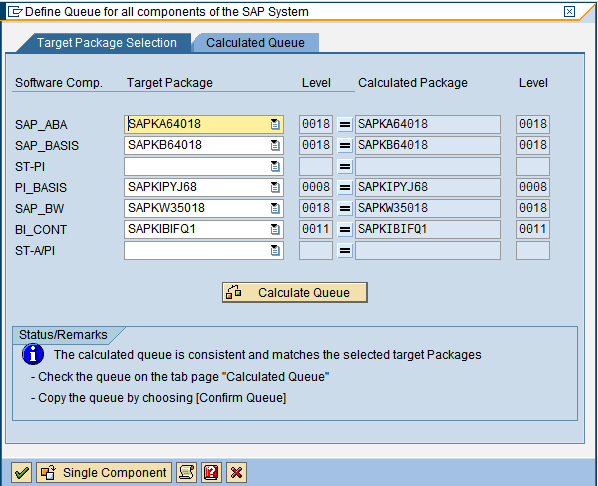
Click the Green Check button
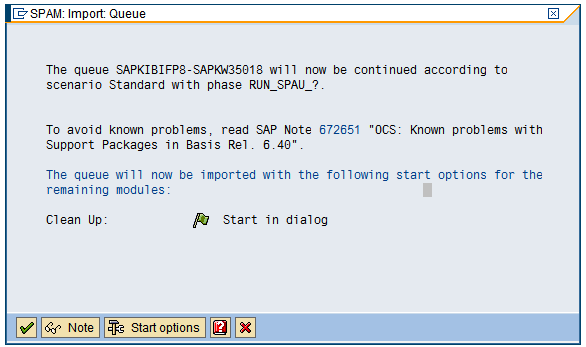
Step 5 : Import Queue:
- Click the “Truck” icon at the upper left to execute the import
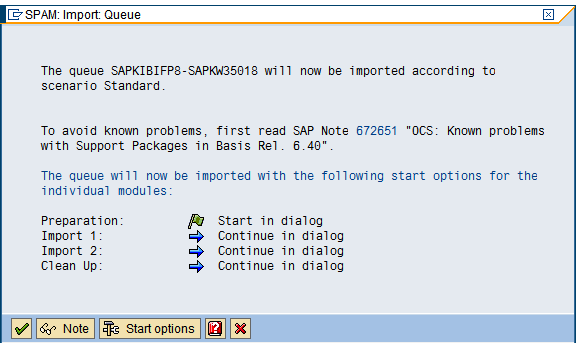
Click on the green checkmark only after making setting in Start option as below:
As seen in the screenshot above, the phases in a SPAM upgrade are:
Preparation: all the preparatory and test steps are performed in this module (such as the test import and Add-on conflict verification). >> Select Dialog from Start Option
Import 1: Dictionary objects are imported and activated in this module. The changes that result from importing and activating the dictionary are still in an inactive state in the system.>> Select Background from Start Option
Import 2: The remaining import steps are performed in this module, including activating the inactive dictionary nametabs. Here, since changes are being imported in various transport objects, no productive operation can take place while this module is running. This avoids any inconsistencies.>> Select Background from Start Option
Clean Up: All the clean up activities are performed in this module, notably a modification adjustment of the Repository objects.>> Select Manual/dialog from Start Option
Step 6 : Adjust SPDD and SPAU:
CALL SPAU when below screen comes and capture SPAU and send it to ABAP Team,Similarly do for SPDD.
Then press Continue button:
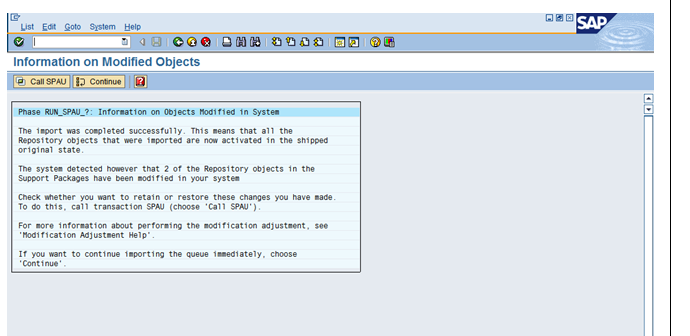
SPAU: This transaction is used for adjusting the objects imported during the upgrade
SPDD: This transaction is used for adjusting the data dictionary objects imported during the upgrade
Click on the green checkmark.
Click on the green checkmark.
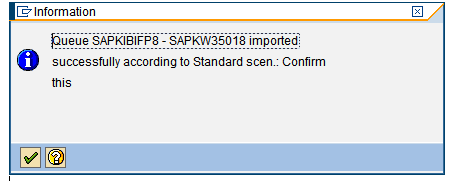
Step 7 : Confirm Queue:
Confirm the queue by going to Support Package à Confirm
Once Support packs are imported successfully then Run SGEN as below:
Generating objects using transaction SGEN
NOTE: Before you run SGEN make sure that database archiving is off.
- Go to transaction SGEN
- Click on Generate all objects of selected software component
- Click continue
- Select All and Press Continue
- Select the Server (Note: Production will have CI and Dialog but not Dev, DC or Sandbox)
- Click continue
- Press the Start Job Directly button (this screen is called Load Generator – Job Monitor)